One of the driving forces behind starting a print shop was to have full access to my own press to edition my engravings. I have been making relief engravings for eight years, and though it is very time consuming I love the engraving process because it requires me to be detail orientated. It begins with a few sketches, followed by a drawing on the blackened surface of the block, and then the actual engraving. I use synthetic blocks called Resingrave as the material I engrave into.
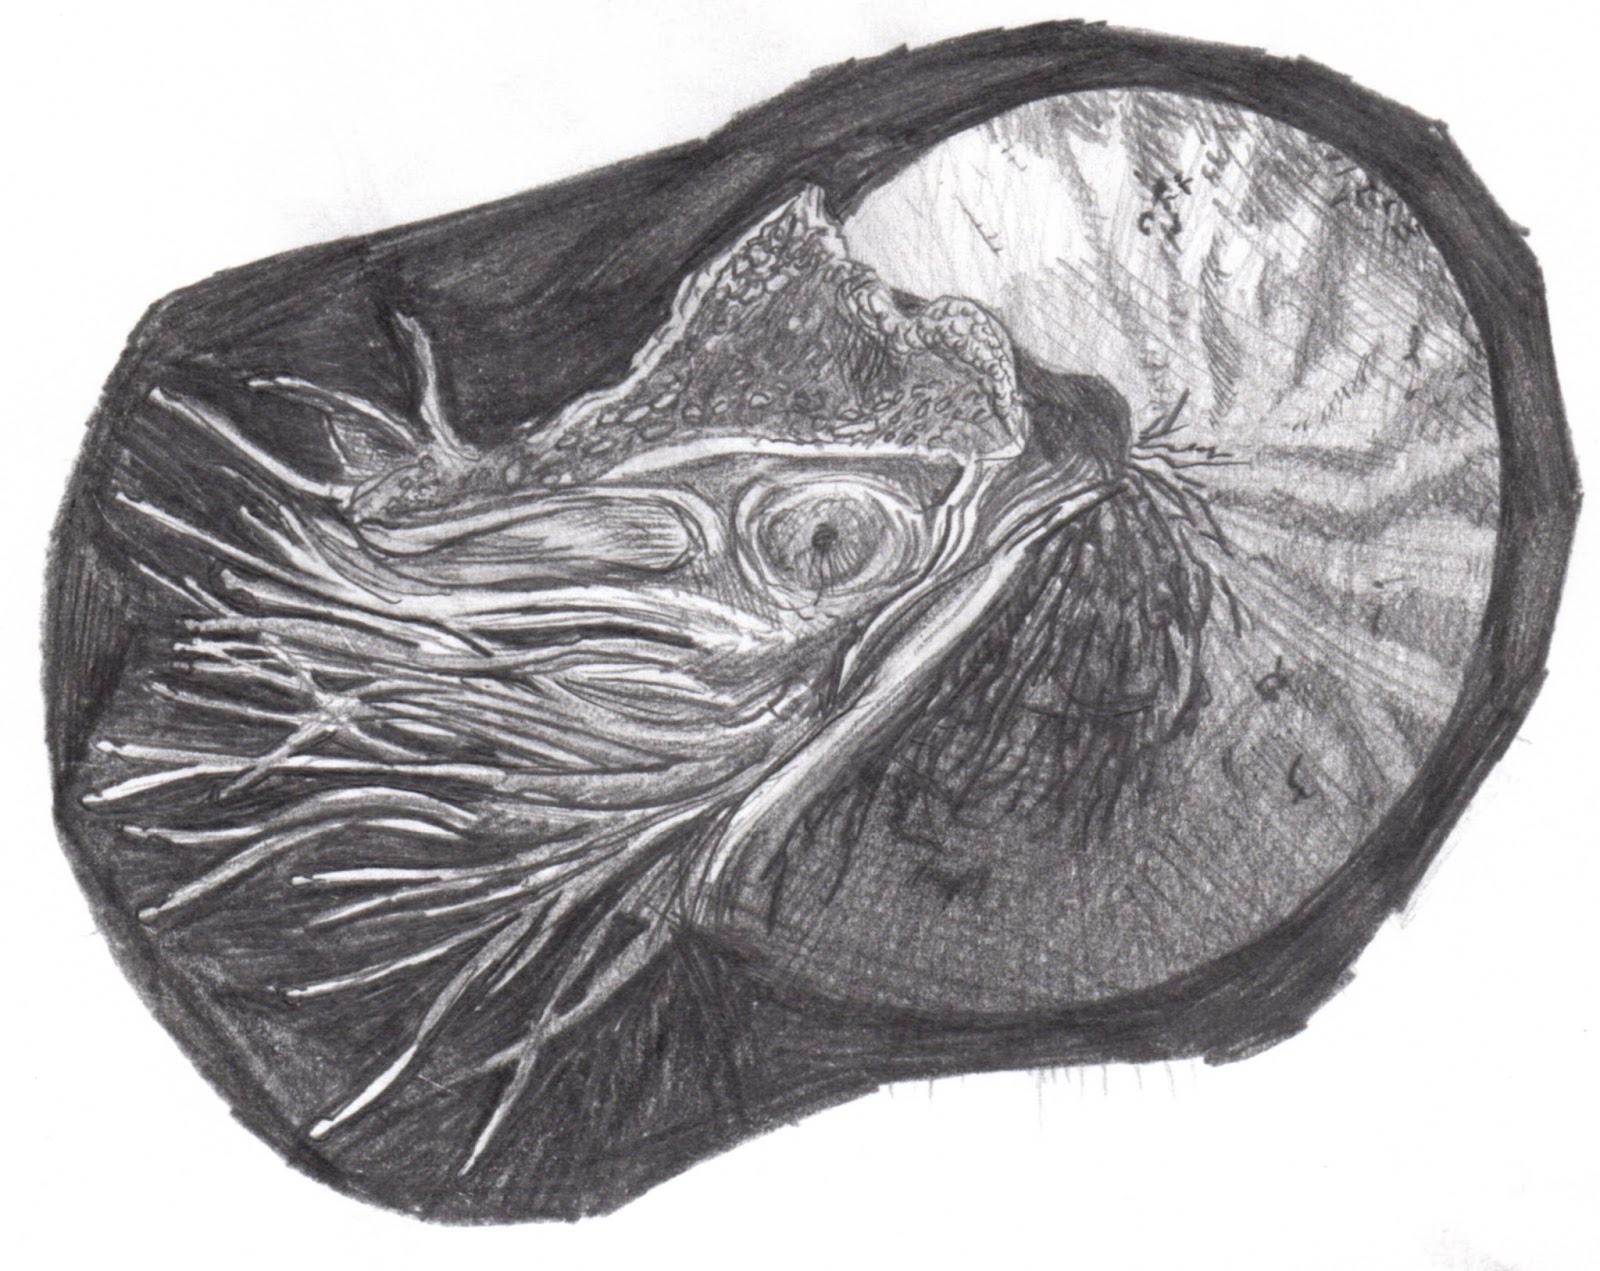
The Nautilus Original Sketch

The Final Engraved Block
Using extremely sharp tools called burins, I remove material from the blocks surface one fine line at a time. The parts of the block that are not removed are what will print when editioned. The starting image is reversed because, when editioned, the block will print the image mirrored. In the case of the Nautilus block, I wanted the final image showing the tentacles facing to the right, so the block was engraved with them facing left. This Nautilus block is the first edition I have pulled at Spofford Press! I thought documenting the process may be of some interest to you!

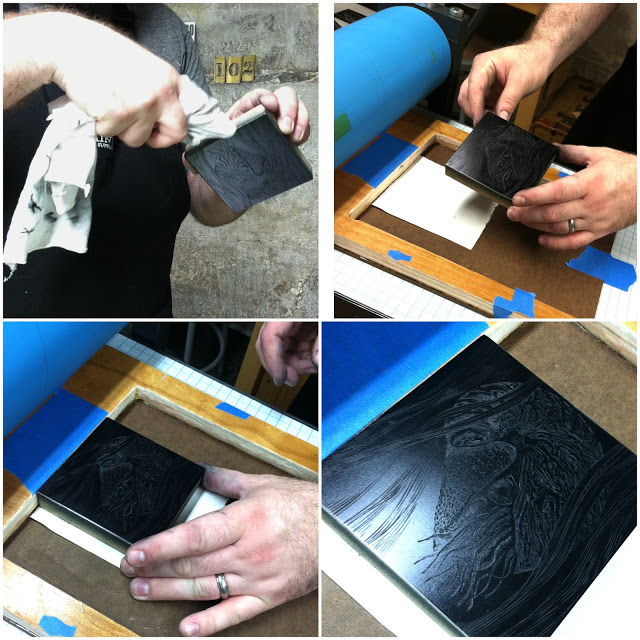
The Nautilus block engraved and ready to be printed.
This is a picture of the actual block taken the day the engraving process was complete. The block's size is only 4 by 4 inches. It is pictured resting on a leather "engraver's bag", which is used to help rotate the block while engraving the surface. The tool in the foreground is called a "Spitsticker". It is used along with other burins to engrave the surface of the block.

The block being inked with a brayer
The printing process can be just as detailed and time consuming as the engraving process! I start by inking the surface of the engraving block using a small hand roller called a brayer. A thin even coat of black ink is rolled over the surface making sure not to get into the engraved lines.
Placing the inked block into the jig used on the press bed.
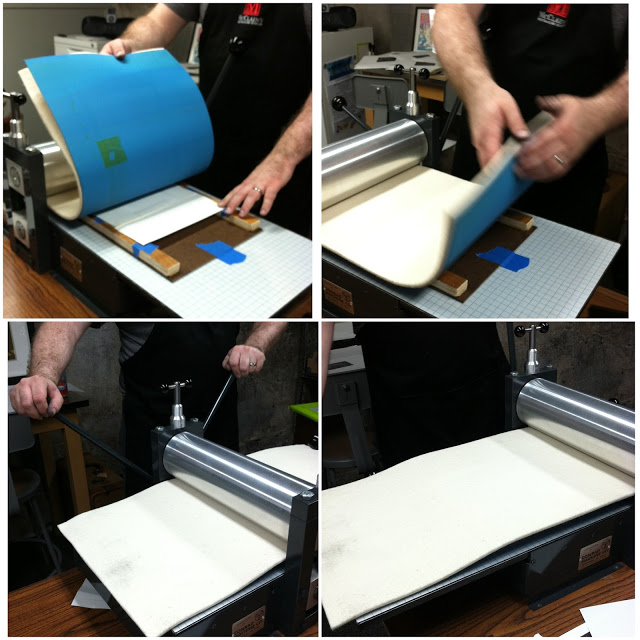
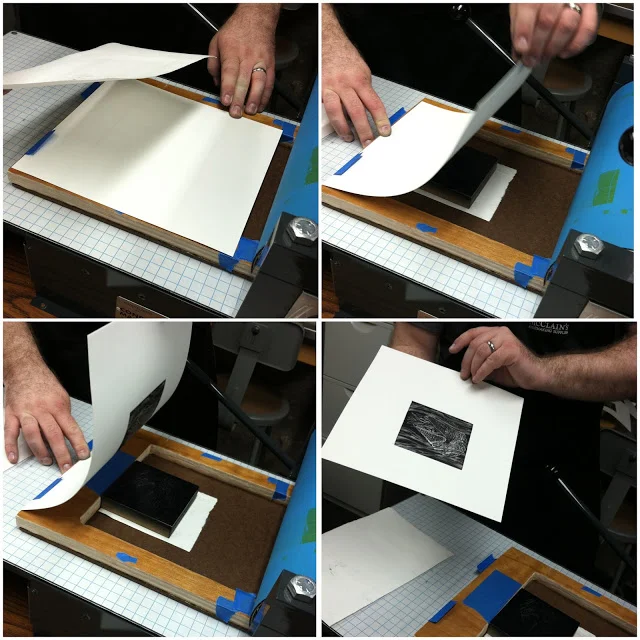
Taking the block in hand, being careful not to touch the inked surface and smudge it, I wipe the very edges of the block. This helps make a clean straight impression on the paper when the print is made. A little ink on the edge can smear onto the paper and ruin the print. Once wiped, the block is placed onto the press. I use a jig made of hard board and wood to hold the block in place. Blue tape is used as a registration system to align the block and paper in the same spot each time it printed. Look at the sheen on that block!

The blank paper goes onto the inked surface of the block.
I take a piece of the printing paper and place it directly onto the inked surface of the block. Rule of thumb for laying the paper is "Gentle & Swift". When lining up the paper, I can make small adjustments to make sure it is square over the block, but once I start to lay it onto the block's surface it has to be in one quick swoop. Once the paper is placed flat on the block, it cannot be moved, bumped, even breathed on too deeply. If it moves at all the print will be smudged.
Cranking it through!
Next, the blankets are placed over the flat paper, again making sure not to move the paper as the blanket covers it. I am using a re-purposed rubber offset lithography mat along with a thick felt as blankets for printing engravings. The bright blue rubber mat has some give to it, and makes a nice clean impression when it takes the paper through the press. The felt is for cushioning and to protect the steel roller when the print in brought through the press. I crank the star wheel and the press bed rolls under the roller, making the block press into the paper as it goes.
It's A Print!
Once through the press, the blankets are carefully taken off of the paper and the paper is pulled off of the block revealing the print! This step is also done in one swoop. If the paper is shuffled or moved at all as it is pulled straight off of the block it will smudge the final print.

Time to Dry.
The print is hung up along with the others and they dry for about 3-5 days, depending on humidity and other factors like paper thickness and how heavy the application of ink is.

There's the edition!

Trimming up the final 30.
About 5 days later I went through all of the prints I made once they were all dry. Of the 55 printed, I was shooting for 30 perfect ones and that's what I got! The other 25 were either a little to dark or just not exactly like the others. When I edition a block the prints have to be exactly alike. It's an old college rule that stuck with me. Nobody wants to be the one to get a slightly filled in or faded Nautilus!

The prints were made on a piece of paper slightly larger then what I wanted for the edition, so the final step before signing and numbering them is to trim them all to the same size.

The Finished Print!
The final print for the Nautilus is a 4x4 in. image centered on a 7.5 in. x 7.5 in piece of paper. Edition size is 30 prints, printed on German Zerkall book weight paper.